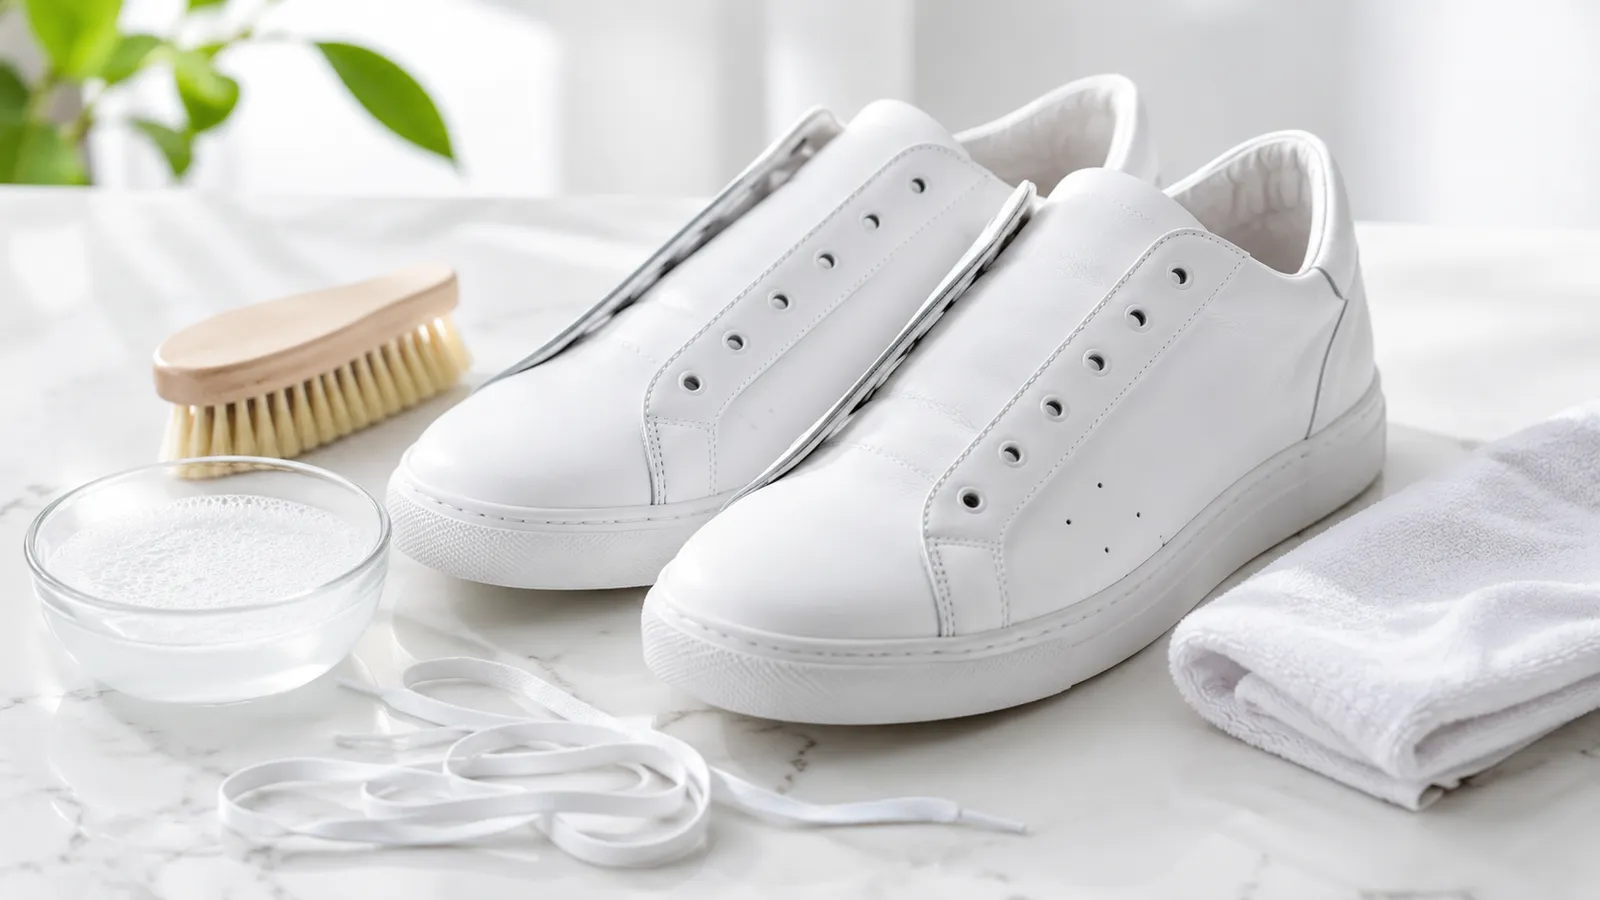
How to Clean White Shoes Without Turning Them Yellow
Clean white canvas, mesh, synthetic, and leather shoes without leaving yellow marks, soap residue, or heat damage.
Written by
EverydayFixes Editorial Team
In This Guide
Fast Solution
Quick Answer
Remove the laces, identify the shoe material, and brush away dry dirt before using water. Mix only a few drops of mild liquid detergent with lukewarm water, clean one small section at a time, and use a separate damp cloth to remove every trace of soap.
Blot the shoes, support their shape with plain white paper, and air-dry them at room temperature in shade with good airflow. Yellow marks are often made worse by leftover cleaner, over-wetting, bleach, direct sunlight, radiators, or tumble dryers.
Check the care label and test every cleaner on a hidden area. Do not use this wet method on suede or nubuck, and never mix bleach with vinegar, ammonia, acids, or other cleaners.
Time Required
45–60 minutes plus drying
Difficulty
Easy
Best For
White canvas, mesh, synthetic, and smooth leather sneakers
Important
Bleach, soaking, and direct heat
Understand the issue
Why White Shoes Turn Yellow After Cleaning
White shoes can look worse after cleaning when detergent dries inside the fabric, dirty rinse water moves through the upper, glue or foam becomes over-wet, or the shoes are dried with strong heat. What looks like yellowing is sometimes removable residue, but it can also be permanent color change in fabric, stitching, rubber, or adhesive.
The safest general method is material-first: use dry cleaning before wet cleaning, keep the solution weak, avoid soaking, remove residue thoroughly, and let the shoes dry slowly. Canvas and durable synthetic fabric usually tolerate more moisture than mesh, knit, leather, suede, and shoes with heavily glued decorative parts.
Cleaner or detergent residue
Too much soap can remain inside white fabric and dry as a yellow, grey, or stiff film. Residue is especially common when thick foam, padded tongues, or tightly woven canvas are not wiped or rinsed thoroughly.
Over-wetting and dirty water movement
Soaking can carry soil, adhesive residue, or dissolved grime from one part of the shoe into another. As the water evaporates, it may leave rings, tide marks, or uneven patches.
Direct heat or strong sunlight
Radiators, hair dryers, tumble dryers, and intense sun can affect glue, foam, rubber, and some textile finishes. Heat can also dry the outside before the inside, trapping moisture or residue.
Harsh chemicals or strong bleach
A cleaner that is too concentrated can alter fabric, stitching, logos, leather finishes, and adhesive. Bleach may brighten one material while yellowing or weakening another.
Mixed-material construction
A single sneaker may combine mesh, synthetic overlays, leather, foam, rubber, glue, and printed details. A method that is safe for the canvas panel may be too wet or abrasive for the surrounding parts.
Prepare first
What You Will Need
Gather these items before starting.
Soft-bristled shoe brush or clean toothbrush
Use it dry first to remove loose soil. Reserve a separate brush for rubber soles so grit is not transferred to the upper.
Mild liquid detergent or footwear cleaner
Use a small amount diluted in water. Avoid products containing bleach, heavy fragrance, fabric softener, or unknown solvents.
Two bowls or fresh changes of lukewarm water
Keep cleaning solution separate from clean rinse water so dirt is not repeatedly wiped back onto the shoe.
White microfiber cloths
Use one for cleaning and another for wiping away residue. White cloths make dye or dirt transfer easier to see.
Plain white absorbent paper or shoe trees
Support the shape during drying. Avoid printed newspaper because ink can transfer to damp lining.
Optional material-specific cleaner
A leather-safe or manufacturer-approved cleaner is preferable for delicate finishes and valuable shoes.
Safety and care
Before You Start
Read the shoe care label and manufacturer instructions before cleaning.
Test the diluted cleaner on a hidden edge and let the test area dry completely before treating the visible upper.
Do not soak suede, nubuck, smooth leather, memory foam, electronics, lights, decorative hardware, or heavily glued shoes.
Never mix bleach with vinegar, ammonia, acids, or other cleaning products.
Stop if color transfers to the cloth, the finish becomes sticky, the material darkens unevenly, or glue begins to soften.
Work in a ventilated area and keep cleaners away from children and pets.
Main method
Step-by-Step Instructions
Follow every step in order for a safer and more reliable result.
Step 1
Identify the material and inspect the care label
Check whether the upper is canvas, mesh, knit, synthetic, smooth leather, suede, nubuck, or a combination. Look for glued decorations, printed logos, foam edges, damaged stitching, and areas where color may bleed.
Use the general wet method only on materials that can tolerate controlled moisture. Redirect suede and nubuck to a dry-first method, and use a leather-safe product when the finish is delicate or valuable.
Helpful Tip
Take a clear photo before cleaning so you can compare color, texture, and stain boundaries after the shoe dries.
Step 2
Remove laces, loose insoles, and dry dirt
Take out the laces so you can reach the tongue, eyelets, and covered seams. Remove insoles only when they are designed to come out; forcing glued foam insoles can tear them or change their shape.
Brush the entire dry shoe, including seams and the edge of the sole. Let wet mud dry before brushing so it lifts away instead of spreading into the fibers.
Step 3
Clean the laces separately
Massage removable laces in a small amount of diluted mild detergent, paying attention to the sections that sat under the eyelets. Rinse repeatedly until the water runs clear and no slippery feel remains.
Lay the laces flat to air-dry. Do not reinstall damp laces because they can transfer moisture and residue back to the tongue.
Step 4
Prepare a weak cleaning solution
Add a few drops of mild liquid detergent to a bowl of lukewarm water. The solution should feel lightly soapy, not thick or highly foamy.
Prepare a second bowl of clean water for residue removal. Change the cleaning water whenever it becomes visibly grey or gritty.
Helpful Tip
More detergent usually creates more rinsing work and a higher risk of residue; it does not automatically clean better.
Step 5
Clean the sole without transferring grit
Use a separate cloth or brush on the outsole and rubber midsole. Work around the tread, sidewall, and textured edges, then wipe away loosened grime with a damp cloth.
Keep dirty sole water away from the white fabric upper. A melamine cleaning sponge may help on plain rubber, but patch-test it and keep it away from painted logos, leather, and glossy coatings because it is mildly abrasive.
Step 6
Clean the upper one small section at a time
Dip the brush or cloth into the solution, remove excess liquid, and work gently from the cleanest area toward the dirtiest. Use light circular motions on durable canvas and light blotting or short strokes on mesh and knit.
Do not flood seams, foam collars, or bonded overlays. Support delicate mesh from inside with your hand or a clean cloth so the material is not stretched while brushing.
Step 7
Remove every trace of soap
Use a clean cloth dampened with plain water to wipe the upper repeatedly. Rinse the cloth often and continue until it no longer picks up foam and the shoe does not feel slippery or stiff with product.
Treat residue removal as part of the cleaning process, not an optional final wipe. Incomplete residue removal is one of the most common reasons white fabric dries patchy.
Step 8
Blot, reshape, and air-dry in shade
Press a dry towel against the shoe to lift surface moisture without rubbing. Insert plain white paper loosely or use shoe trees that are safe for damp footwear.
Place the shoes at room temperature in a shaded, ventilated area. Open the tongue and aim a fan across the shoes if needed. Replace damp paper and wait until the lining, toe box, and insoles are completely dry before reassembly.
Step 9
Troubleshoot yellow or grey marks after drying
If the surface feels stiff, chalky, or slightly slippery, the mark may be residue. Re-wipe the whole affected panel evenly with a clean damp cloth, blot, and air-dry again.
If the material itself has changed color, the rubber has oxidized, or adhesive has migrated through the fabric, repeated scrubbing may make the damage worse. Stop and consider a material-specific cleaner or professional shoe care.
Choose the right method
Instructions by Material or Surface
Use the instructions that match your item.
White canvas
Best for: Everyday canvas sneakers and fabric panels
Canvas usually tolerates gentle brushing and controlled moisture. Clean the full panel evenly rather than saturating only the center of a stain, then wipe away soap with clean water.
For a stubborn mark, repeat the mild method after the first treatment dries instead of increasing detergent concentration.
Colored stitching, printed graphics, and glued trims may bleed or loosen even when the canvas itself is washable.
White mesh or knit
Best for: Running, walking, and training shoes
Use a soft brush or microfiber cloth with minimal pressure. Support the upper from inside and blot rather than aggressively scrubbing open knit or engineered mesh.
Avoid pushing dirty foam deep into the openings. Use several light passes and frequent clean-water wipes.
Hard brushing can fuzz fibers, stretch openings, and damage bonded overlays.
White smooth leather
Best for: Leather sneakers with a finished surface
Use a barely damp cloth and a leather-safe cleaner or a very weak soap solution. Wipe away product promptly, dry with a soft cloth, and apply a compatible conditioner only when the manufacturer recommends it.
Clean the leather separately from fabric panels so you can control moisture and pressure.
Do not soak leather or use abrasive sponges on the finished surface.
White rubber midsoles and toe caps
Best for: Plain, unpainted rubber surfaces
Use mild solution and a soft or medium brush. Work along textured grooves, wipe clean, and repeat rather than using harsh solvent.
A patch-tested melamine sponge can help with surface scuffs on plain rubber, but use very light pressure.
Avoid abrasive cleaning on painted stripes, logos, glossy finishes, and nearby leather.
Suede or nubuck panels
Best for: Textured leather sections on mixed-material shoes
Keep the wet white-shoe method away from suede and nubuck. Mask or protect those sections and use a suede brush, eraser, and suede-specific cleaner instead.
Water can create dark rings, flatten the nap, or leave an uneven texture.
More options
Alternative Methods
Use these options only when they suit the material.
Spot-clean a small fresh mark
Best for: A limited mark on an otherwise clean washable upper
Brush away loose material, apply a tiny amount of weak solution, and feather the damp edge outward with clean water so a sharp tide line does not form.
Blot and dry the entire treated panel evenly.
Use a manufacturer-approved washing method
Best for: Textile shoes whose care instructions explicitly allow machine washing
Follow the brand instructions exactly. Remove laces and loose insoles, use a protective mesh bag when recommended, select a cold gentle cycle, and air-dry.
Do not assume that all canvas or mesh shoes are machine washable; glue, foam, leather, and decoration may change the recommendation.
Professional shoe cleaning
Best for: Valuable shoes, dye transfer, adhesive stains, or repeated yellowing
A specialist can inspect whether the problem is removable residue, oxidation, color loss, or adhesive migration before stronger treatment is attempted.
Protect your item
Common Mistakes to Avoid
Using undiluted bleach or mixing bleach with another cleaner.
Treating canvas, mesh, leather, suede, rubber, and glue as if they were the same material.
Soaking the whole shoe when a controlled hand-clean is enough.
Using the same dirty brush or water on the sole and upper.
Scrubbing mesh, knit, leather, logos, or stitching with a hard brush.
Leaving detergent inside fabric or foam.
Drying on a radiator, in a tumble dryer, with a hair dryer, or in harsh direct sun.
Wearing or storing shoes before the inside is completely dry.
Optional tools
Helpful Products for This Fix
These product types are optional, not mandatory.
Soft shoe-cleaning brush
Best for: Canvas, rubber, and durable synthetic uppers
Soft bristles lift soil while giving better pressure control than a stiff household brush.
Mild footwear cleaner
Best for: Mixed-material white sneakers
A product labeled for footwear is usually easier to dose and rinse than improvised concentrated household mixtures.
White microfiber cloth set
Best for: Cleaning, residue removal, and blotting
Separate white cloths reduce grit transfer and make color or dirt transfer visible.
Common questions
Frequently Asked Questions
Why did my white shoes turn yellow after washing?
The most common possibilities are leftover detergent, dirty water drying inside the fabric, over-wetting, heat, sunlight, oxidation, or adhesive moving through the upper. If the material feels stiff or chalky, re-wiping the full panel with clean water may remove residue. Permanent color change will not improve with repeated scrubbing.
Can I use bleach on white shoes?
Bleach is risky on mixed-material footwear because it can damage fabric, stitching, glue, rubber, leather, and colored details. Use it only when the manufacturer specifically permits it and follow the product label. Never mix bleach with vinegar, ammonia, acids, or another cleaner.
Can white shoes go in the washing machine?
Only when the shoe manufacturer or care label allows it. Hand cleaning is safer for most sneakers, especially shoes containing leather, suede, foam, glued overlays, decorative parts, or structured cushioning.
Does toothpaste clean white shoes?
Toothpaste contains abrasives, whiteners, flavoring, and other additives that were not designed for footwear. It may leave residue or dull a finish. A diluted mild detergent or material-specific shoe cleaner is more predictable.
Can baking soda clean white shoes?
Some washable canvas shoes may tolerate a patch-tested baking-soda paste, but it can leave powdery residue and is not suitable for every finish. Start with the weaker soap-and-water method and use material-specific guidance for leather, suede, or delicate mesh.
How long do white shoes take to air-dry?
Many sneakers need at least 8 to 24 hours, and thick foam or humid conditions can take longer. Wear them only when the inside, tongue, insoles, and toe box are fully dry.
How do I clean white rubber soles without damaging the upper?
Use a separate brush and mild solution on the rubber, wipe away dirt frequently, and protect nearby leather, mesh, paint, and glue. A patch-tested melamine sponge may help on plain rubber with very light pressure.
Was This Guide Helpful?
Your feedback helps us improve future EverydayFixes guides.
Keep solving
Related Guides
How to Clean Suede Shoes Without Ruining the Texture
Clean suede shoes with a dry-first method for dirt, scuffs, water marks, and small stains without flattening the soft nap.
How to Get Smell Out of Shoes and Keep It From Coming Back
Remove odor from sneakers, gym shoes, work shoes, and insoles by cleaning the source, drying moisture, and preventing repeat buildup.